Migration Bulk Update From Date
With Bulk Update From Date, you can migrate entities from one system to another. SyncNow does not modify work systems' schemas; it adds entities, fields, and picklist values to the target work system.
Recommendation:
Perform entity migration in a test environment before running it in a production environment.
📝 Step-By-Step Guide
-
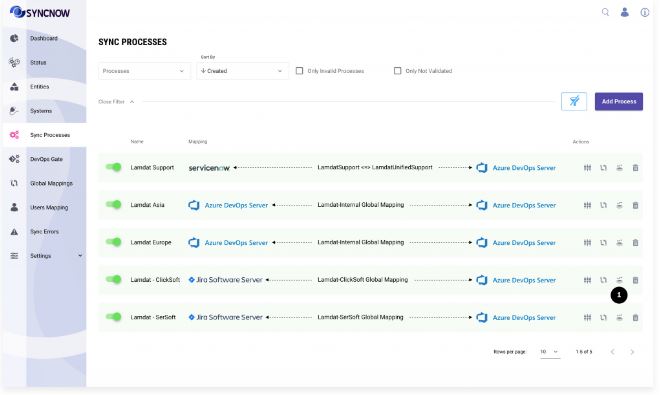
Navigate to the Processes Page
-
Go to the Processes page.
-
Press the Bulk Synchronization button.
-
-
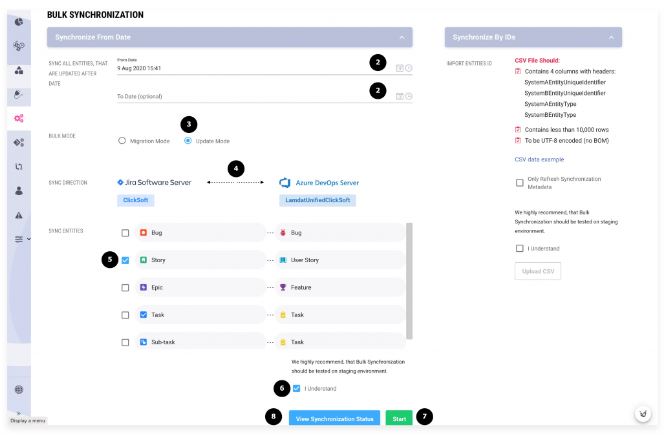
Select the Date Range
- SyncNow will search for entities in the source system that were updated within the selected date range.
-
Select a Mode
- Migration: For entities not previously synchronized.
- Update: For source and target entities already synchronized by SyncNow in the past.
-
Select Sync Direction
- Choose whether to update only one system or both, sequentially.
-
Select Entity Types to Synchronize
- Choose which entity types to include in the migration.
-
Confirm Bulk Synchronization
- Acknowledge that bulk synchronization will update many entities in the target system and that reverting the changes is not possible.
-
Press the Start Button
- Begin the migration or update process.
-
Monitor the Status
-
Press the View Synchronization Status button to monitor progress. This button appears after the sync run starts.
-
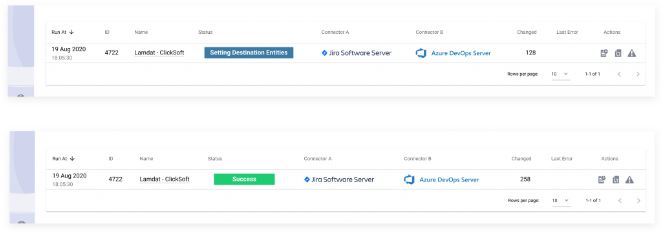
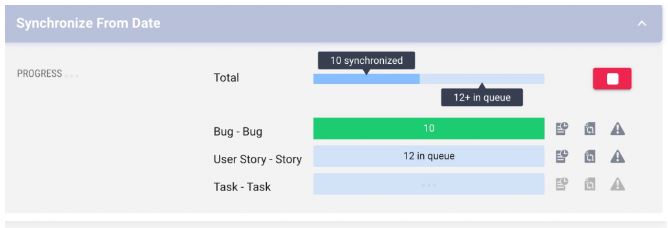
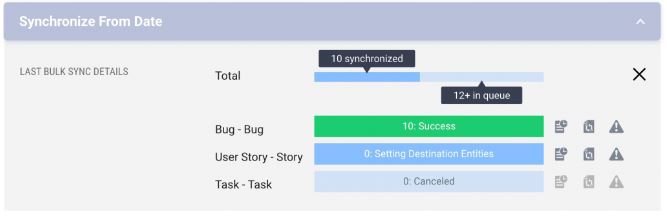
Bulk synchronization status will be displayed as shown below.
-
Review details about a sync run execution of source and target entities in the Log and on the Status Entities page.

-
❌ Cancel Import
-
Cancel the Import Process
-
Click the Cancel button at the top of the window to stop the import job.
-
-
Wait for the Import to Stop
-
The import will be stopped after a short time.
-
Tip:
Always test your migration in a non-production environment first. Use the monitoring tools to track progress and review logs for any issues during the migration.